While completing the Coursera Deep Learning specialization, I started to wonder whether it would be possible to run the Jupyter Notebooks from the exercises on your local machine (or on a different server for that matter).
I thought it would be convenient to:
-
Have access after you’ve finished the course.
Once you have finished the course, it would be interesting to still be able to read, run and experiment with the Notebooks from the course. After I passed the certification, I felt I had understood the material and knew when to apply it, but it felt I would need to go back from time to time, or just dig a bit deeper later on and play with it some more to really get it down. So running the notebooks locally, would save me a lot of trouble.
-
Experiment with the notebooks on different machines
A lot of the starter material focusses on getting the basics right, and rightfully so. Understanding how the algorithms work, how you structure projects, how to prepare data are essential to getting you up and running. But there is more to getting a model in production, so I thought it would be nice to be able to run some notebooks on different environments/hardware like Azure, AWS, Paperspace, GCE, … or even my own DL machine?
My personal experience
Coming from a more C#-world and having limited experience running these notebooks, I was looking for a way to do this. I initially tried downloading each file manually, which turned out not the be a good idea, so I started the browsing the Deep Learning Specialization forums and found a number of students having the same issues.
Writing it down
I found a set of different solutions spread out over the forum, so I deciced to write a comprehensive guide to how to do this.
Step 1: add a bash script to notebook
Open a notebook and on the bottom of your notebook, insert a cell
and paste the following bash script:
!tar chvzf notebook.tar.gz --exclude notebook.tar.gz *
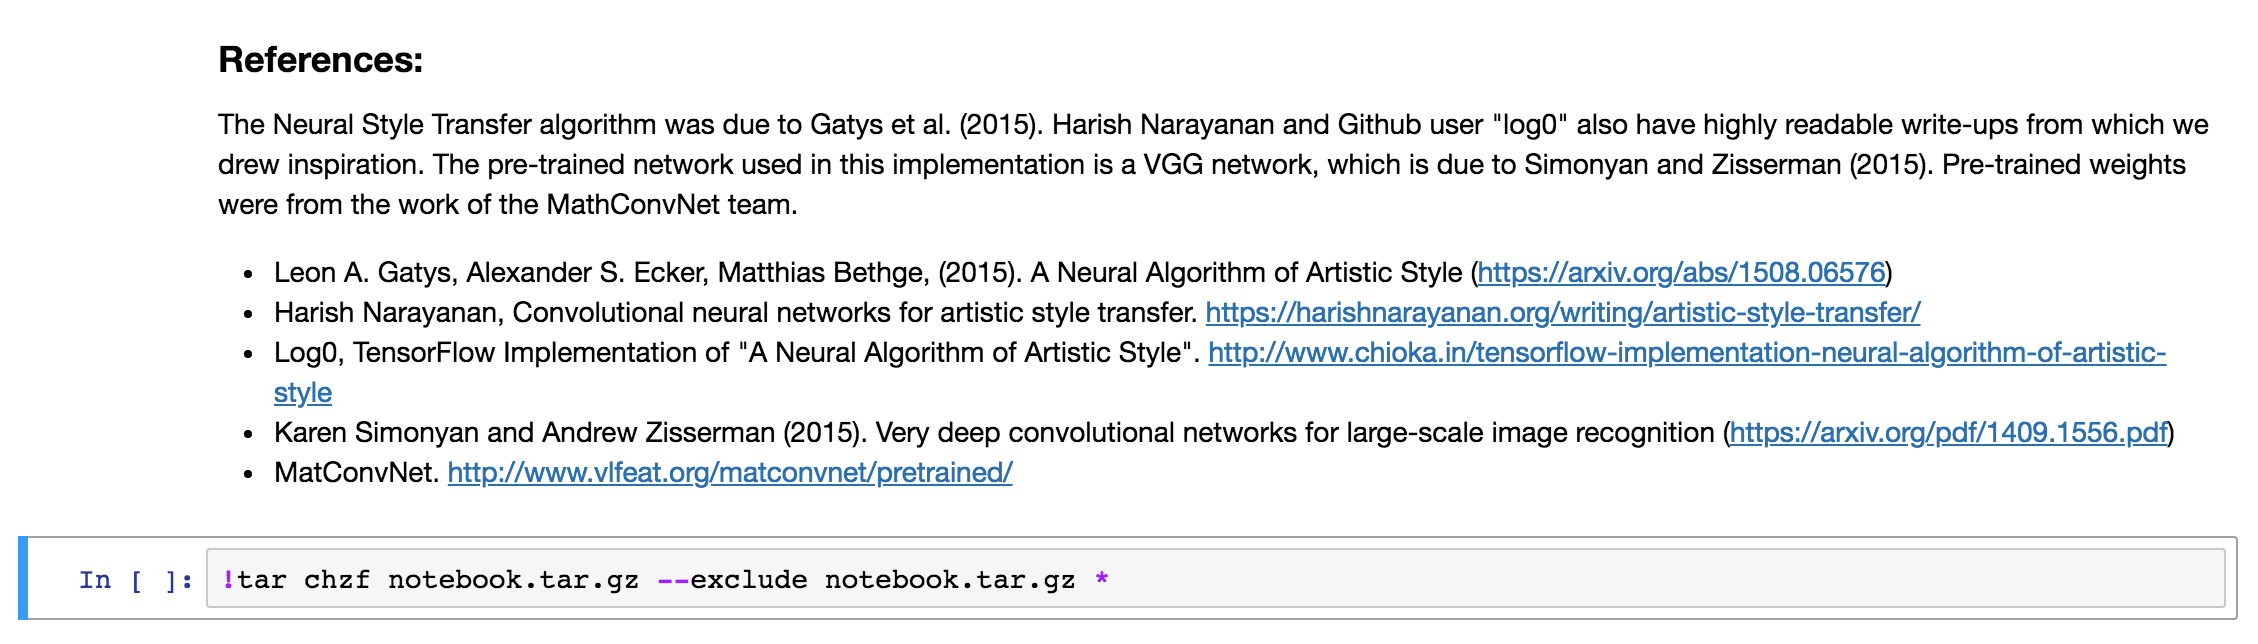
Which should look like this:

or with a cell above it (obviously the text will differ in your case):
The ! in the beginning, this tells the notebook you want to run a bash script instead of Python code.
The tar command will create an archive notebook.tar.gz with all files in the current folder (including subfolders) and compress it to a single archive.
The --exclude flag will make sure our notebook.tar.gz file is never included in the archive.
Step 2: Run the cell
Run the cell you added in Step 1 (Shift+Enter) to export and compress the notebook. This might take some time and while the operation is still running, the cell will look like this (note the aterisk at the beginning):

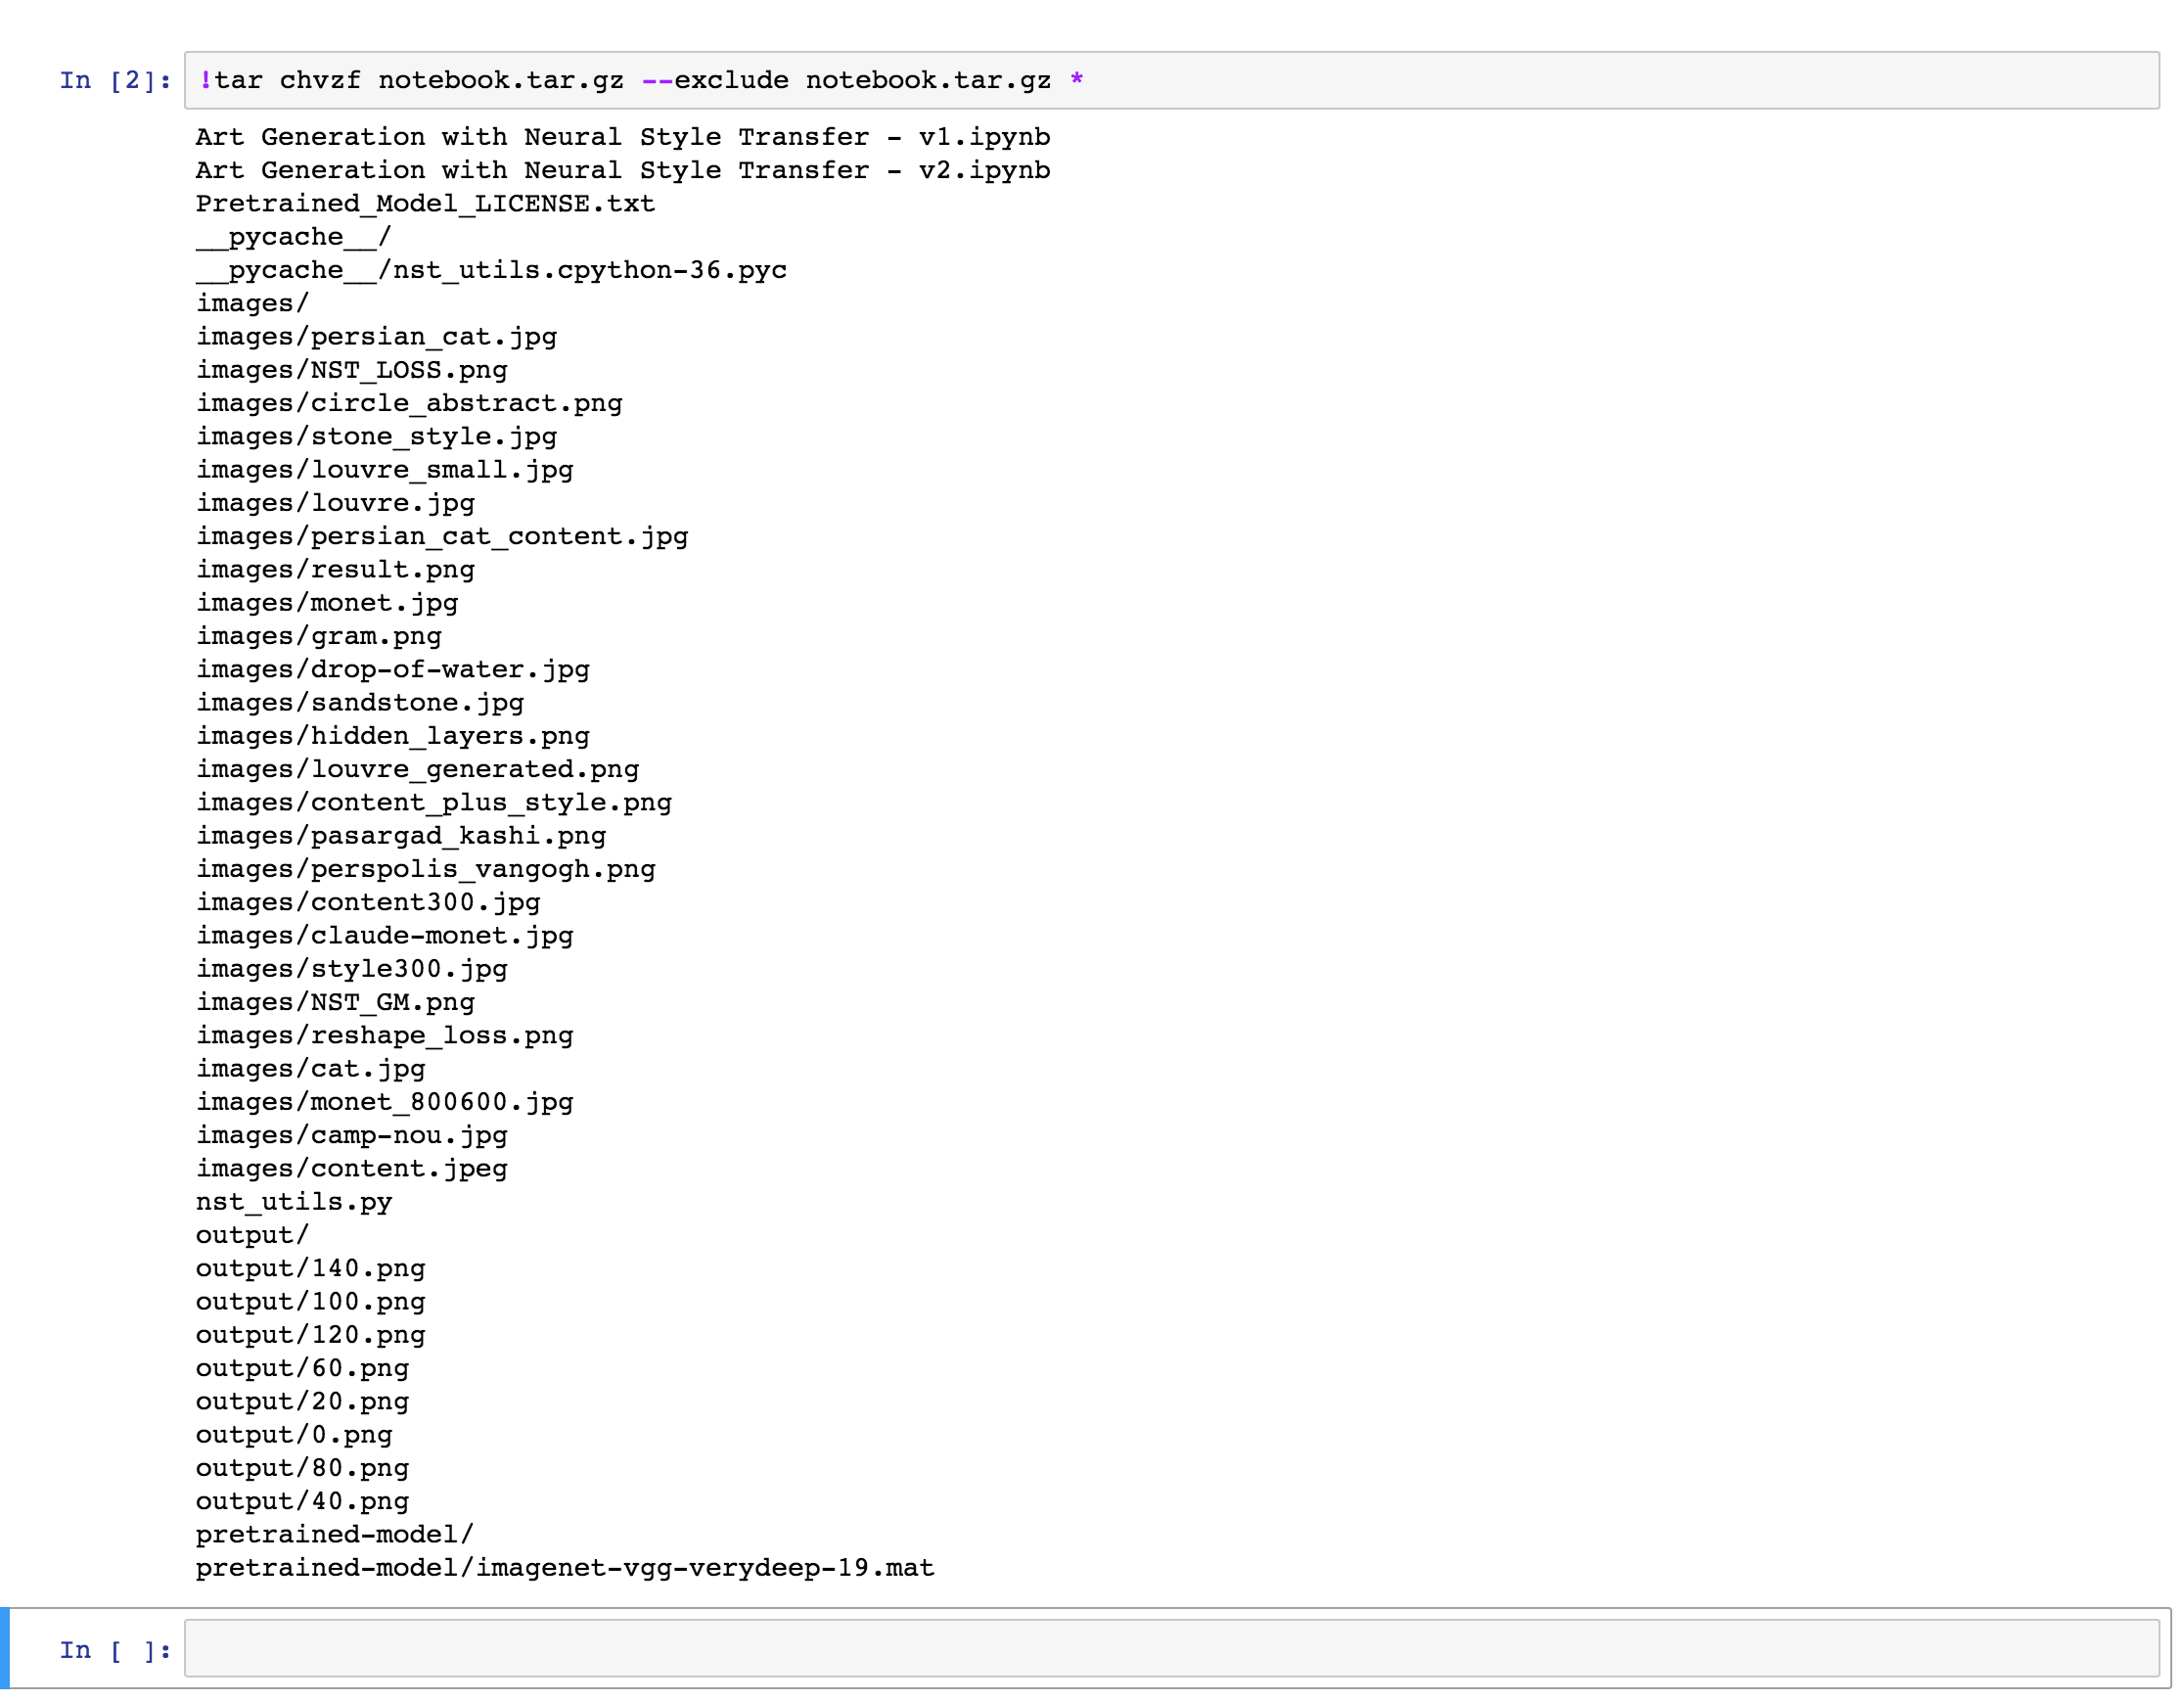
Once the export is done, you will see a similar output to the one below. The output will obviously depend on the content of what is being exported and compressed:
Error note:
On some notebooks, I got an error: File /models/camarche.h5 removed before we could read it. I’m not sure as to why this error occured, but so far I did not encounter any problems related to it while running the notebooks.
Step 3: Download the archive
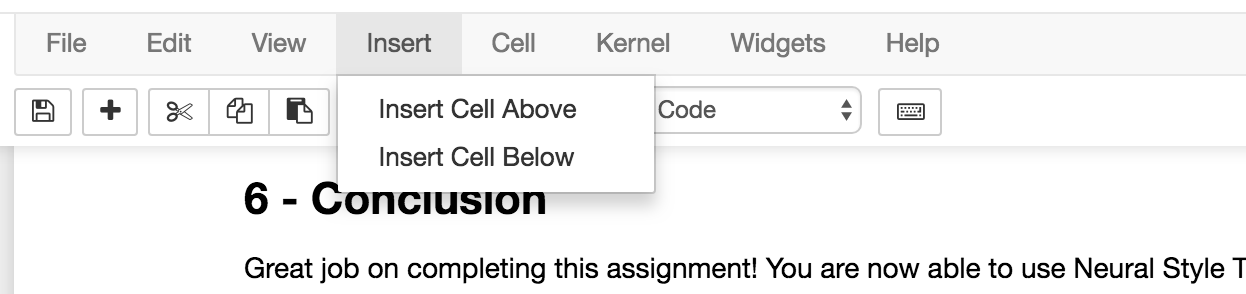
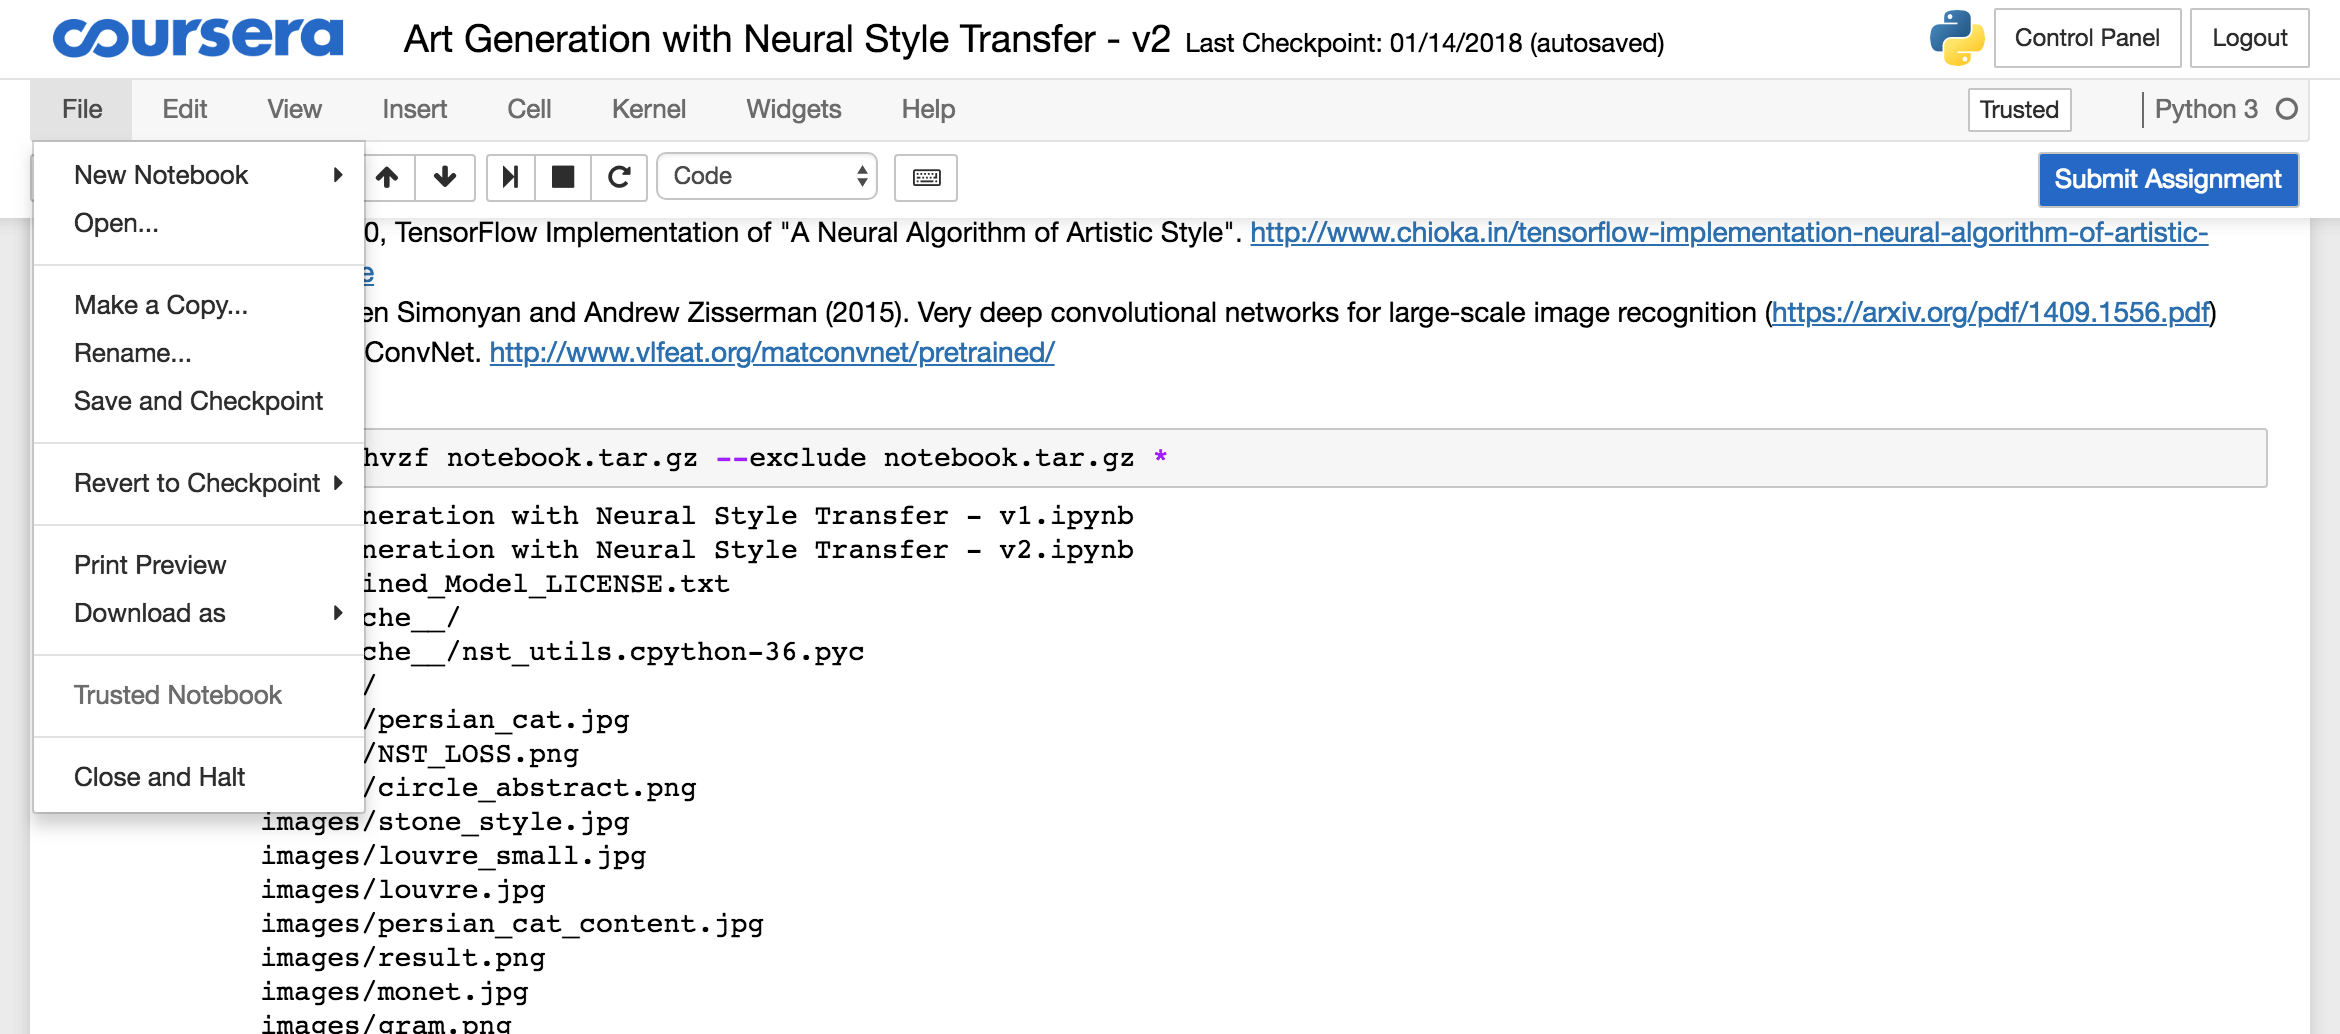
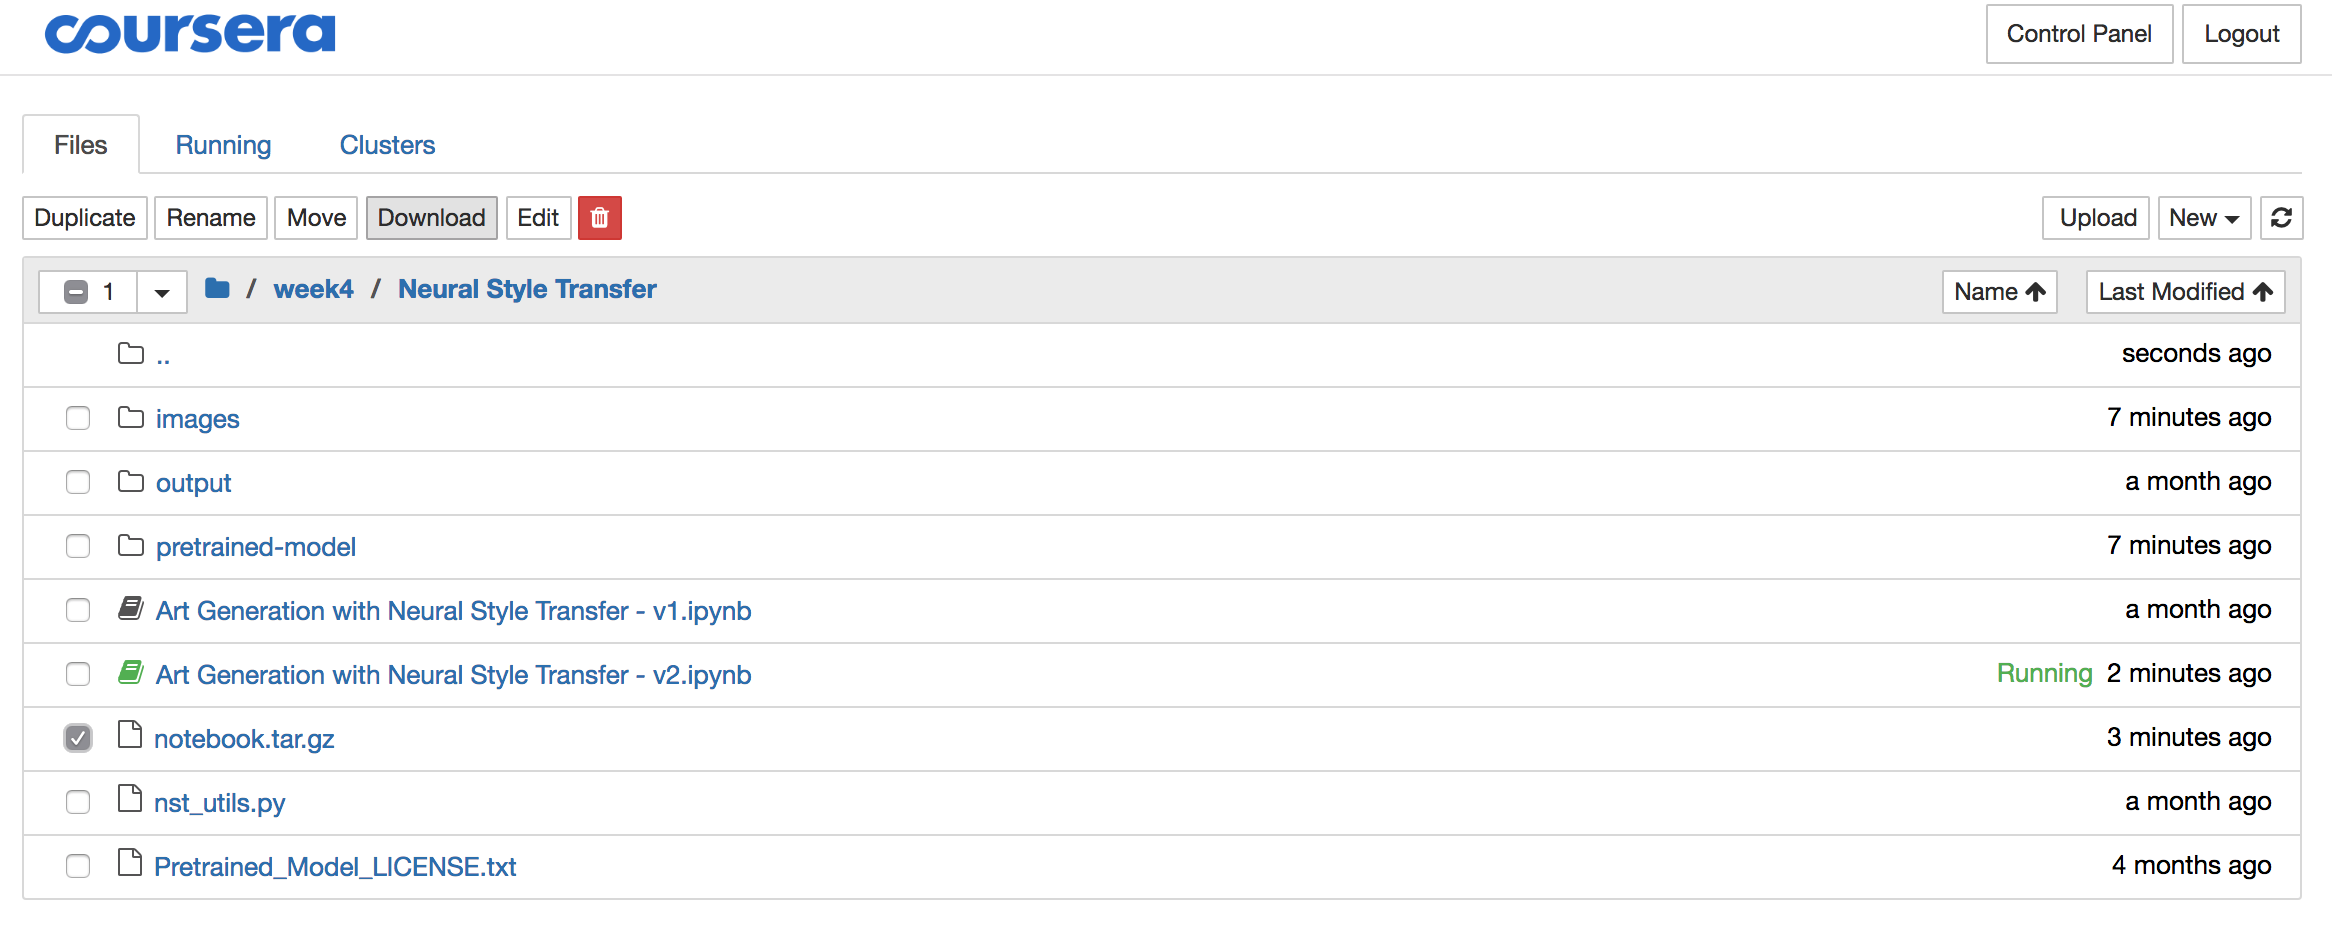
To download the archive, you need to open the Jupyter folder from the menu:
Select the “notebook.tar.gz” file and click the download button and store the file locally:
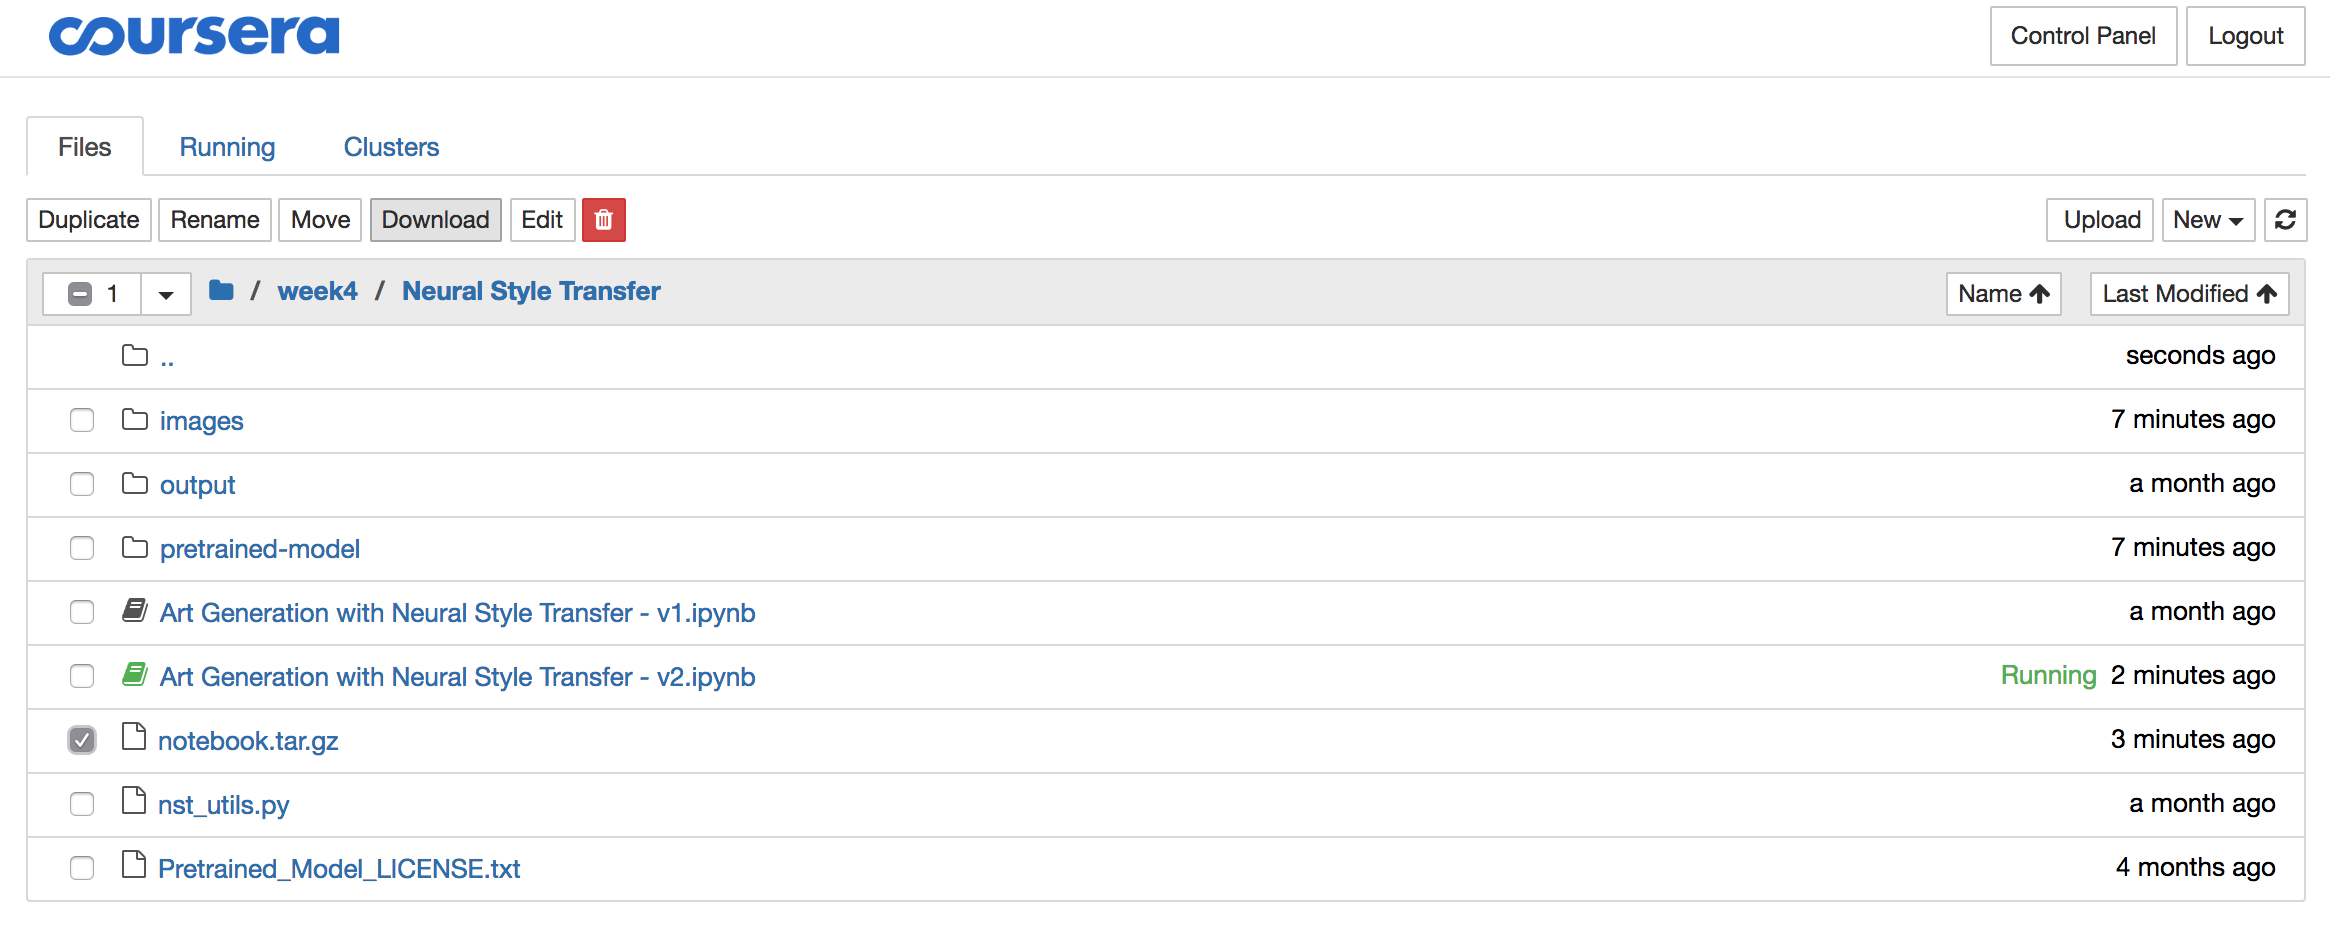
Step 4: Delete the archive from the Coursera server
The solutions often contain significant amounts of data like images, pre-trained models,… So once you downloaded the archive, it is best you delete it using the red download button, all while the archive is still selected:
Step 5: Extract the archive
On your local machine (or server) extract the archive using your favorite unzipping/untarring tool or run the following script on your command line:
tar xvzf notebook.tar.gz
Step 6: (Optional + only once) Install Jupyter
To run any Jupyter Notebook, you will need to install Jupyter. The easiest way to do this is by installing Anaconda: https://www.anaconda.com/download/
and running the script below from your cmd:
conda install jupyter tensorflow
If you just want to install Jupyter, the installation is very well documented here:
Note: The Coursera Notebooks need Python v3.
Step 7: Run the notebook on your machine
Once you have completed the previous steps, you can run the notebook from its folder on the command line using the following command:
cd DIRECTORY_THAT_CONTAINS_THE_NOTEBOOK # *.ipynb file
jupyter notebook
and a browser session should appear.
Note: You can run the notebooks on any pc, but it is highly recommended to have a good NVidea GPU for training in order to finish the training in a reasonable timeframe.
Thanks
I would like to thank both the mentors as well as the students of the Coursera Deep Learning specialization for the support on this and other topics. For this article, Paul T Mielke was of special help.
Feedback and improvements
I hope you enjoy the article and would love to hear from you. If you have questions or find errors on the page, please do let me know: @zerotosingularity.
Enjoy!